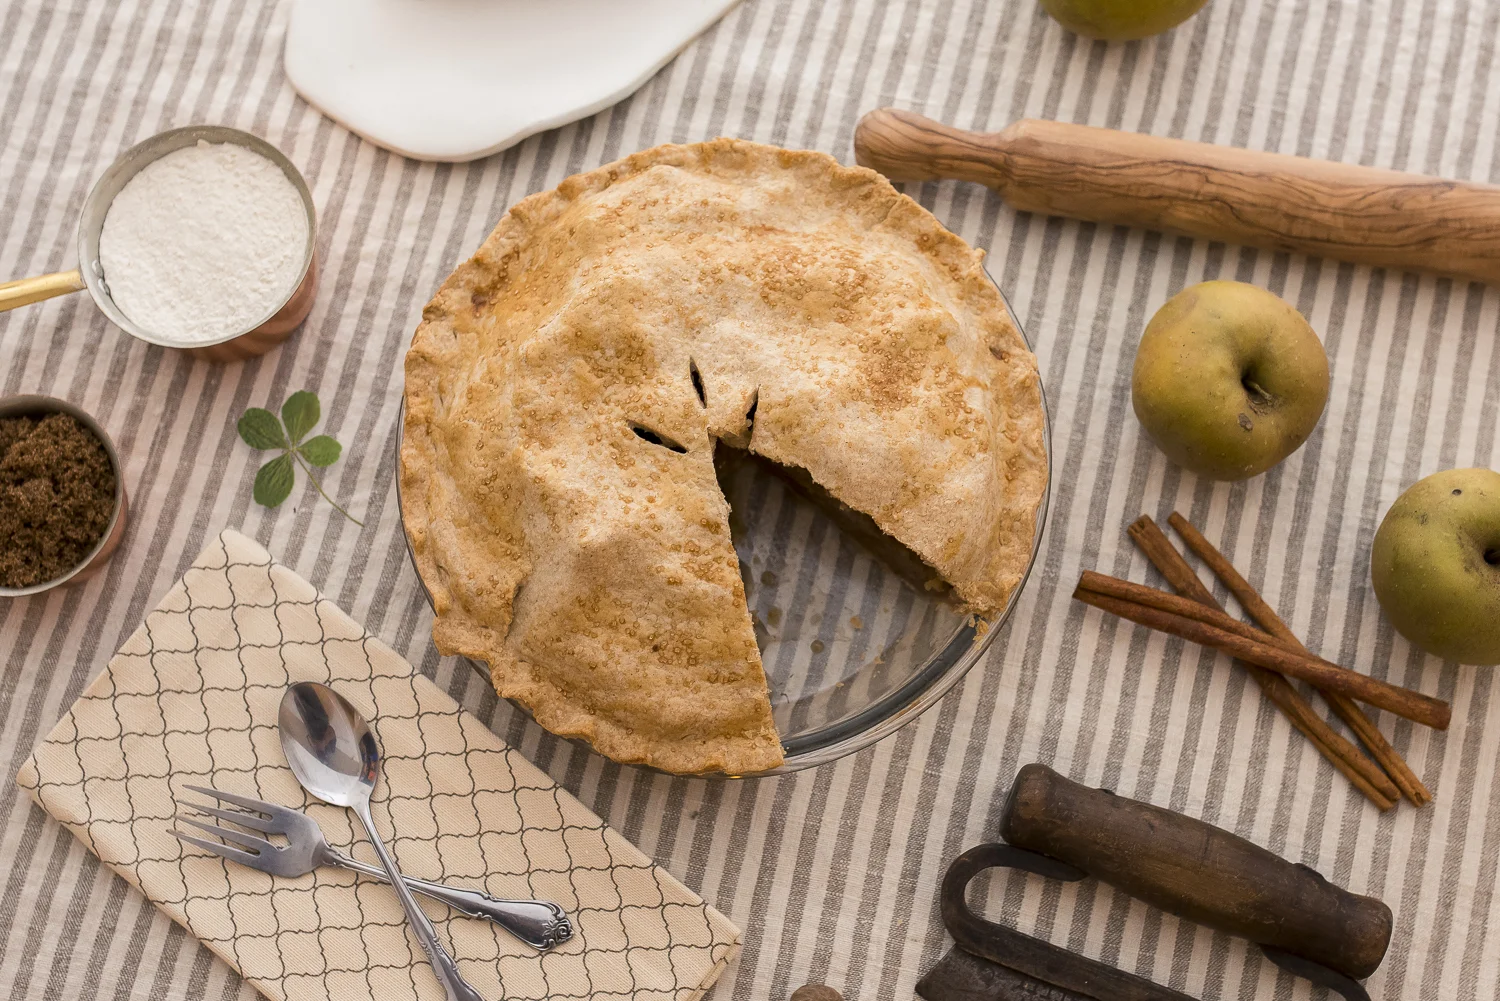
Russet Apple Pie
Makes one 9-inch pie
Who doesn’t love apple pie? The first pie I ever made without supervision was apple. It was August, the first of the local orchard apples were becoming available, and I was a nine year old on summer holidays, filling my time by experimenting in the kitchen. It took me most of the day to make this first pie, not to mention several phone calls interrupting my mom’s work day to ask “just a quick question.” It seems only suiting then, that my inaugural post pays homage to this simple and comforting dessert.
Growing up in southern Ontario, fall was an amazing time of the year with seemingly endless varieties of apples available at the many local orchards. I am particularly a fan of the ones that are tart, crisp, and lend themselves to cooking, but are just as delicious as a snack on their own. In British Columbia (my now home) orchards are abundant, but when I first moved here I missed apples, like Cortland, that I used to easily find back in Ontario. After discovering the russet apples of my sister’s apple tree, however, I now miss them a little less
Russet refers to the rough, discoloured skin of a group of apples, rather than a single type. My sister and brother-in-law are fortunate to have many fruit trees in their yard and their apple tree boasts bright green russets that are flavourful and amazingly aromatic. They are similar in appearance to a granny smith, but with rosy patches and rough, leathery skin which give them a slightly more rustic look. Though I can’t be certain, based on reading I believe the apples from their tree may be Brownlees Russets. In the fall I am the lucky recipient of many pounds of these apples which cook down and caramelize beautifully – making them perfect for this pie.
The pastry recipe here is a good staple that my mom uses, as did my grandmother. You can make an all butter version by replacing the lard with equal amounts butter, but for a special treat I recommend lard if you can find it in good quality. Look for it from a local butcher, or render your own.
Ingredients
Pastry
1/3 cup unsalted butter, cold
1/3 cup good quality lard (or additional butter)
2 cups pastry flour
½ tsp sea salt
1/4 cup ice water
Filling
1.5 lbs cooking apples (about 6 cups), peeled & sliced
2 tbsp flour
1/3-½ cup natural cane or dark brown sugar (will vary depending on how tart your apples are)
1 tsp cinnamon
1 tbsp unsalted butter
Method
Preheat oven to 425° F.
In a large bowl, combine flour and salt. Cube butter and lard. Add to the flour, working the mixture with a pastry cutter, or your hands, until the flour and fat are combined to a fine crumb texture (some larger, pea-sized bits of fat are fine). Drizzle in the ice water and using your hands bring the dough together into a ball. Set-aside to rest for 20-30* minutes while you prepare the filling.
To prepare the filling simply place the peeled, sliced apples in a large bowl. Sprinkle in flour, sugar and cinnamon. Toss to combine.
When dough is ready, divide in two sections, about 1/3 and 2/3 (you’ll want slightly more pastry for the bottom layer). On a lightly floured surface, roll each section of dough into a rough circle, about ¼ inch thickness. Place larger piece on the bottom of a 9-inch pie plate. Pour in apple mixture and dot the top with 1 tbsp butter. Lay remaining circle of dough over the pie, trimming the excess edges with a knife. Finally, secure edges with your finger tips, making a scalloped edge, or use a fork to press around the sides. Using a sharp knife, create a few small slits in the centre of the pie to allow steam to escape.
Cook pie in the oven for 20 minutes. Then reduce heat to 350° F and continue for an additional 30-40 minutes. Starting the pie at a high temperature and then reducing allows the crust to crisp on the bottom, and brown nicely on the top early in the cooking process.
The pie is done when a knife inserted into the small slit at the top easily enters the apples, and some juices are bubbling at the sides.
Allow pie to rest for at least 1-2 hours before serving. Serve to your liking on its own, with fresh whipped cream, ice cream, or a sharp cheddar.
*Many pastry recipes indicate refrigeration prior to working the dough. I have personally found that it is not required, and the dough is much easier to work with after resting at room temperature. Experiment and see what you like best.